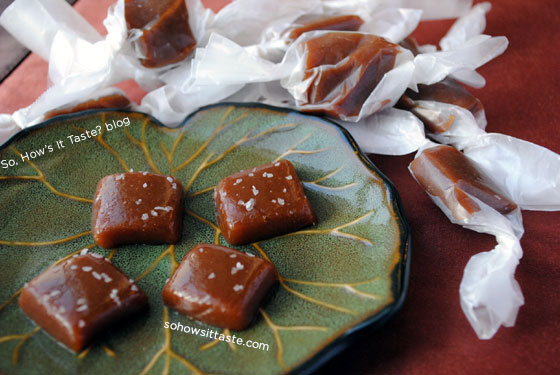
Happy birthday to me, happy birthday to me, happy birthday to me-eeee, happy birthday to me! Yep, today’s the big day, although my celebrating started a few days ago and will continue well into the week. You’d think I’d have a cake recipe for you, but instead I decided to go the candy route. Salted Caramels to be specific. I’ve had my eye on making these for months, but I’ve always heard that homemade caramel is so scary and so finicky. Wrong! I had such a fun time making these goodies and they were incredibly easy. And talk about addicting. When I first cut the squares, I think I ate about two rows full. Oops, how did they all fall into my mouth?

So, how’s it taste?
Um, fabulous. Ridiculously delicious for such a tiny piece of candy. The combination of sweet and salty is over-the-top good. I made myself sick the night I made these because I kept saying “ok I’ll just have one more” and that turned into a whole lot more. There’s nothing to be scared about with these caramels. Ina Garten offers a step-by-step picture tutorial on foodnetwork.com. The only part I was worried about is judging the right color of “warm golden brown” for the caramel, so it was handy to have Ina’s picture. It feels like it takes forever for the caramel to darken, but once it starts, it goes fast, so don’t turn away! I substituted Kosher salt for the fleur de sel because I couldn’t find it near me and was too lazy to drive in search of it. The Kosher salt worked great (and it’s much cheaper). I stored my caramels in the fridge and then later put them in a freezer bag (after I individually wrapped them) and put them in the freezer. I prefer to let them come to room temperature before I dig in. These would be great homemade gifts that look like you spent all day in the kitchen.

Salted Caramels
Ingredients:
Vegetable oil
1 1/2 cups sugar
1/4 cup light corn syrup
1 cup heavy cream
5 tbsp. unsalted butter
1 tsp. fine fleur de sel, plus extra for sprinkling (I used Kosher salt)
1/2 tsp. pure vanilla extract
Directions:
1. Prep the pan. Line an 8-inch-square baking pan with parchment paper, allowing it to drape over 2 sides, then brush the paper lightly with oil.
2. Boil the sugar. In a deep saucepan (6 inches wide and 4 1/2 inches deep), combine 1/4 cup water, the sugar and corn syrup and bring them to a boil over medium-high heat. Boil until the mixture is a warm golden brown. Don't stir -- just swirl the pan.
3. Heat the cream. In the meantime, in a small pot, bring the cream, butter and 1 teaspoon of fleur de sel to a simmer over medium heat. Turn off the heat and set aside.
4. Finish the caramel. When the sugar mixture is done, turn off the heat and slowly add the cream mixture to the sugar mixture. Be careful -- it will bubble up violently. Stir in the vanilla with a wooden spoon and cook over medium-low heat for about 10 minutes, until the mixture reaches 248 degrees F (firm ball) on a candy thermometer.
5. Fill the pan. Very carefully (it's hot!) pour the caramel into the prepared pan and refrigerate for a few hours, until firm.
6. Cut the caramel. When the caramel is cold, pry the sheet from the pan onto a cutting board. Cut the square in half. (At this point, I sprinkled the top with the salt and used a pizza cutter to cut the caramels into bite-sized squares. The directions below are for how Ina cuts them.)
7. Roll it up. Starting with a long side, roll the caramel up tightly into an 8-inch-long log.
8. Cut into pieces. Sprinkle the log with fleur de sel, trim the ends and cut into 8 pieces. (Start by cutting the log in half, then continue cutting each piece in half until you have 8 equal pieces.) It's easier to cut the caramels if you brush the knife with flavorless oil like corn oil.
9. Wrap the candies. Cut glassine or parchment paper into 4-by-5-inch pieces and wrap each caramel individually, twisting the ends. Store in the refrigerator and serve the caramels chilled.

 Print
Print


Provence is where I’ve bought my Fleur de Sel! And HAPPPPPPY BIRTHDAY!
Ah, good to know! Thanks for the birthday wishes!
These look great! Are there still any in your freezer? **Wink, Wink** LOL!
I need to get a candy thermometer. I tried to make this exact recipe, and I burned the caramel – but the family still gobbled them up! Glad yours worked out!